Usage Manual

A Store-Floor Usage Manual

A practical guide for store staff and managers to distribute Wallet passes, scan them, award points, redeem rewards, and keep operations recoverable.

Start here
01

The core counter action is scanning the customer's Wallet pass barcode and awarding points

02

Use the card list as a support path for search, checks, correction, redemption, and deletion, not as the normal award entry point

03

Basic can manage multiple cards. Backup, history, promotional notices, and analytics are paid-plan operations

04

Do not enter personal information in notes or display labels, because those fields are included in backup and export workflows

Steps

1. First steps

Prepare store information, point-award mode, rewards, and a test Pass so staff can scan at the counter.

If this is your first time, start here.

Step 1 Free
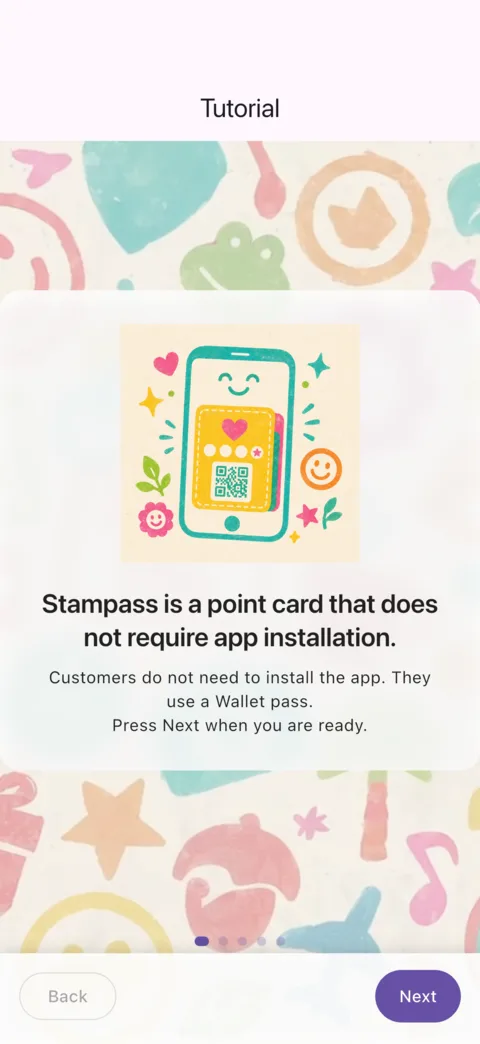
Tutorial
Tutorial screen
First confirm that customers keep the Pass in Wallet and staff scan it in the store app.
Step 2 Free
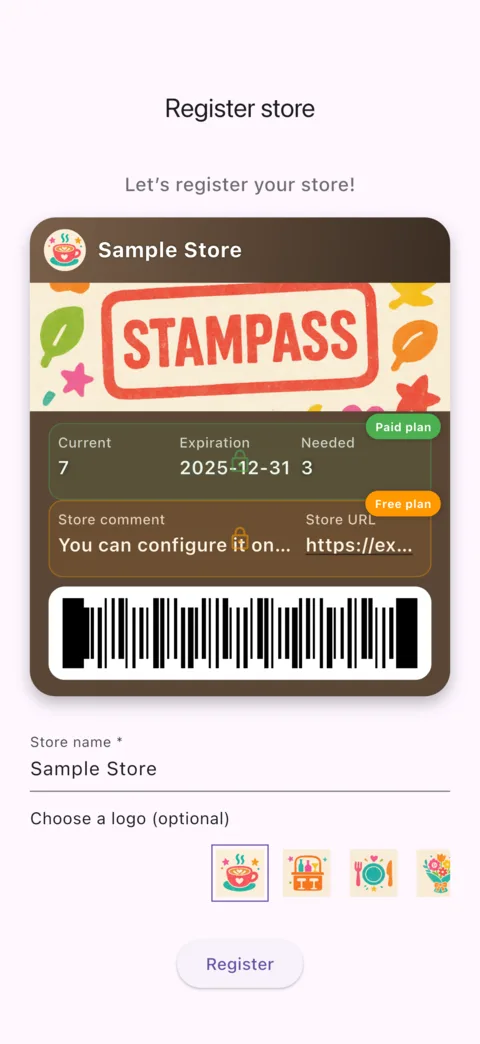
Store setup
Store registration screen
Register the store name and logo that customers will see on the Pass.
Step 3 Free
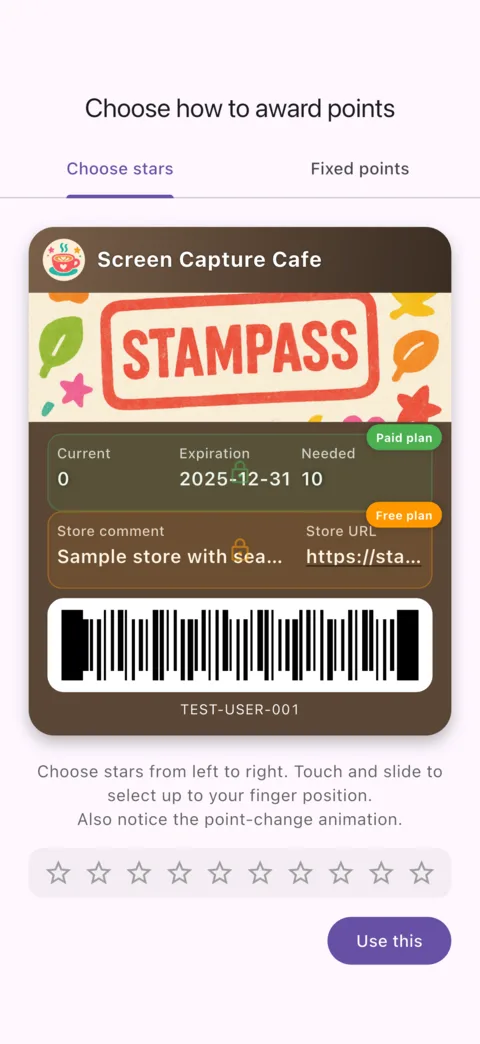
Award mode
Point-award mode screen
Choose fixed points or flexible points based on your counter workflow.
Step 5 Free
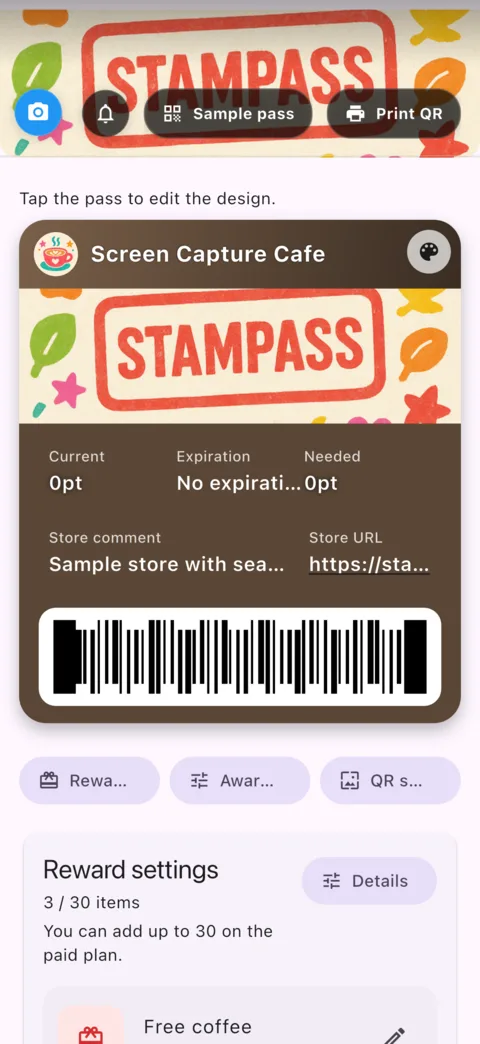
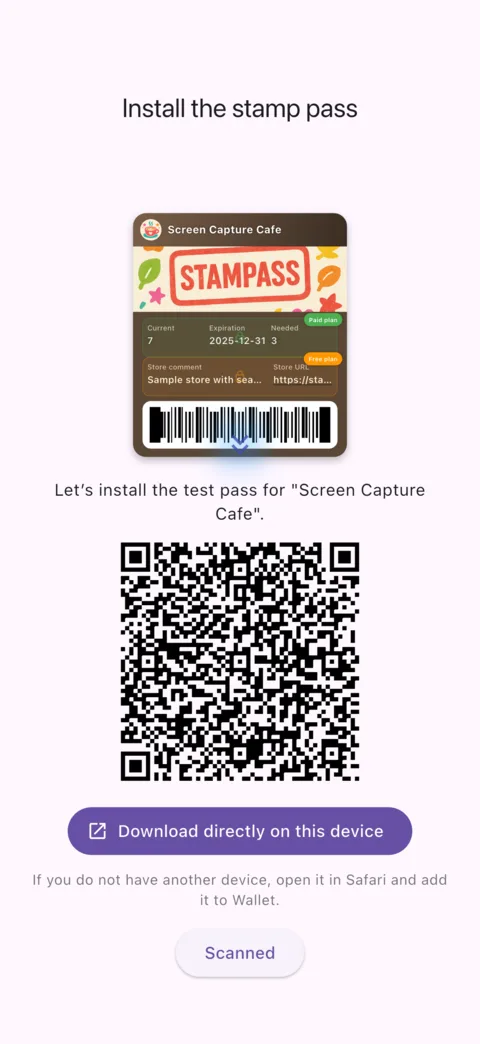
Sample Pass
Sample Pass installation screen
This screen is only for the first store test. Use the scan-screen QR for real customers.

Do This

  1. 1

    Open the app and follow the on-screen guidance.

  2. 2

    Enter the store name and choose a logo if needed.

  3. 3

    Choose flexible point awards or fixed point awards.

  4. 4

    In card settings, add the reward name and required points.

  5. 5

    Add a sample Pass and scan it once from the scan screen.
Steps

2. Hand off the Wallet Pass

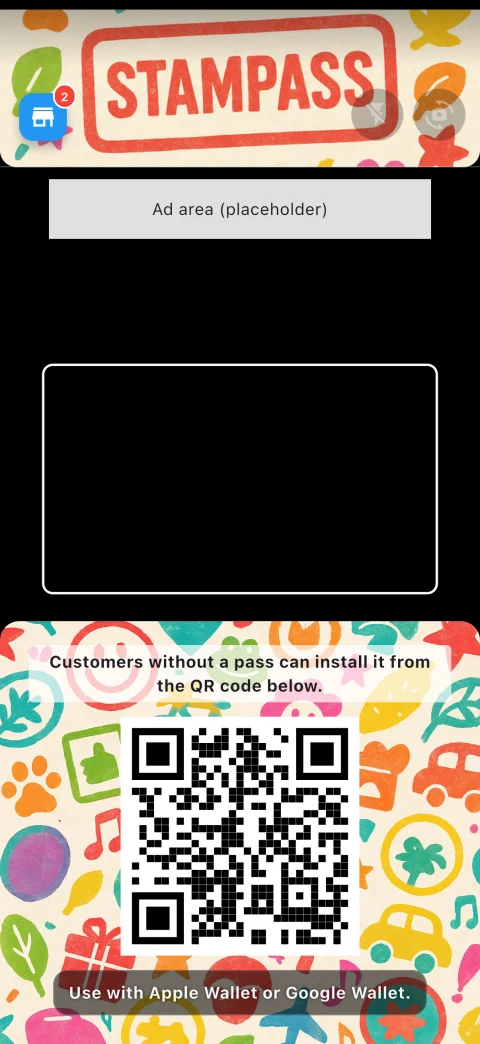
Show customers the QR at the bottom of the scan screen so they can add the Pass to Apple Wallet or Google Wallet.

Use this customer add-pass QR for real customers, not the sample Pass tutorial QR.

Steps 1-4 Free
Customer add-pass QR
Customer add-pass QR at the bottom of the scan screen
This QR is the main handoff path. Customers add the Wallet Pass from here.
Prepare Paid
Pass settings
Card settings screen
Before sharing the Pass, check the Pass appearance, rewards, and QR screen background.

Do This

  1. 1

    Open the scan screen and show the Pass add QR at the bottom.

  2. 2

    Ask the customer to scan the QR and add the Pass to Wallet.

  3. 3

    For counter signage, tap the QR to open the image-saving menu.

  4. 4

    Save either the QR-only image or the ready-to-print poster, then place it near the register or waiting area.

  5. 5

    After the customer adds the Pass, ask them to show the Wallet Pass barcode.

Steps

3. Use stamps at the counter

Scan the customer's Wallet pass during visits, then award points and redeem rewards.

Share this part with staff.

Steps 1-3 Free
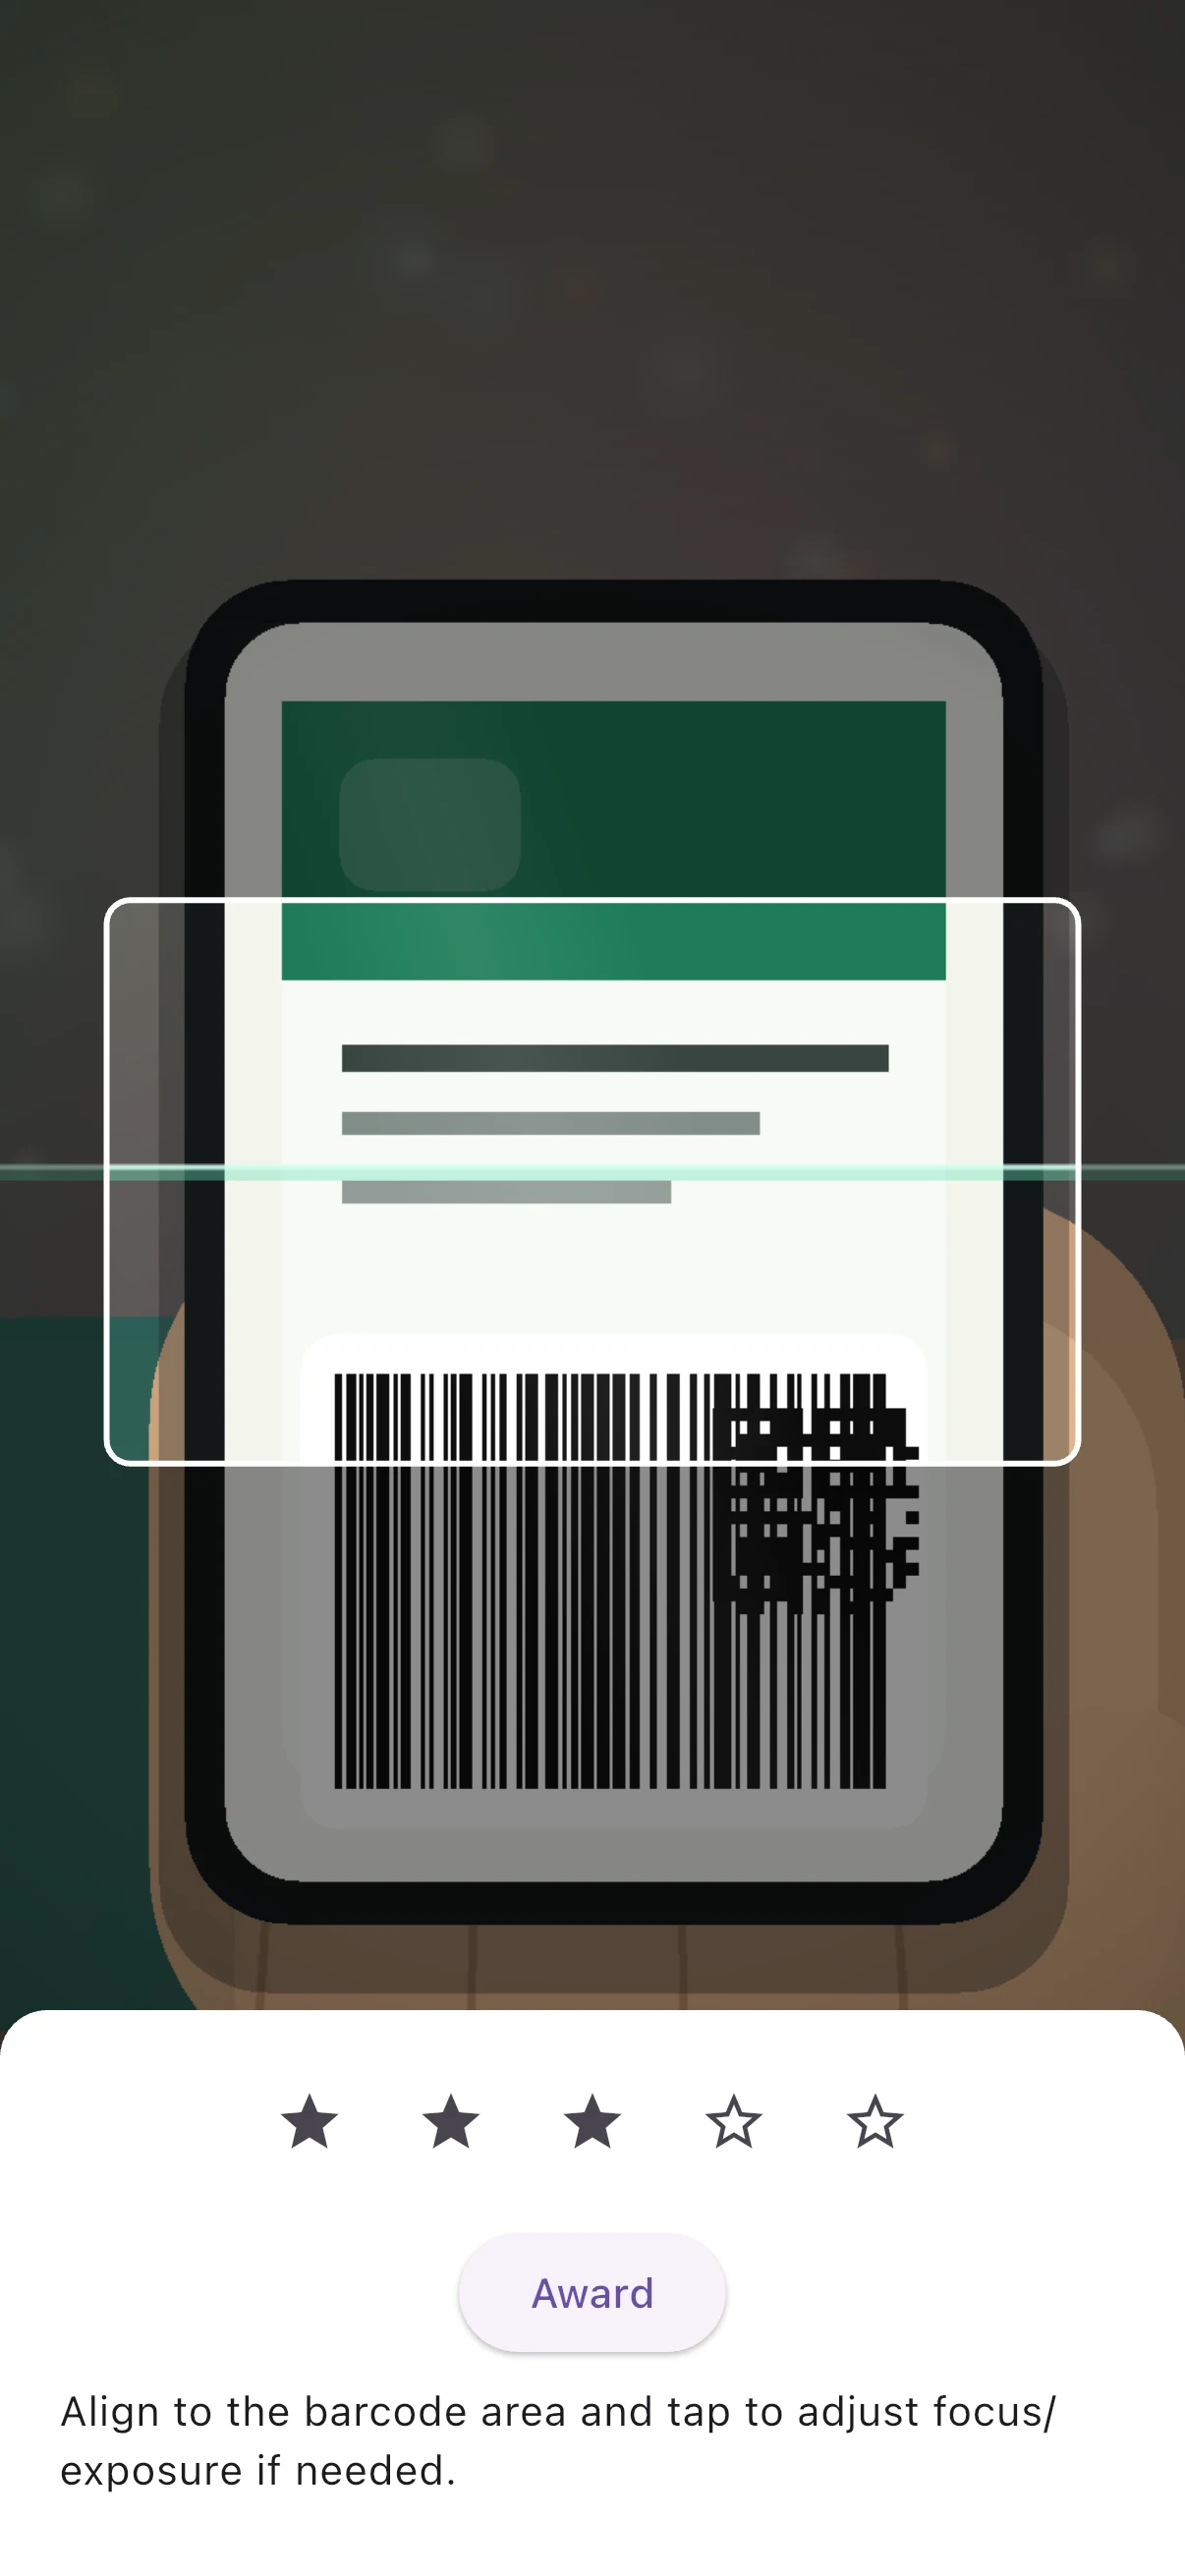
Pass scan and point award
Point-award screen after scanning a Wallet Pass barcode
Scan the customer's Wallet Pass barcode, choose the points, and confirm the award.
Steps 4-5 Free
Card list
Card list screen
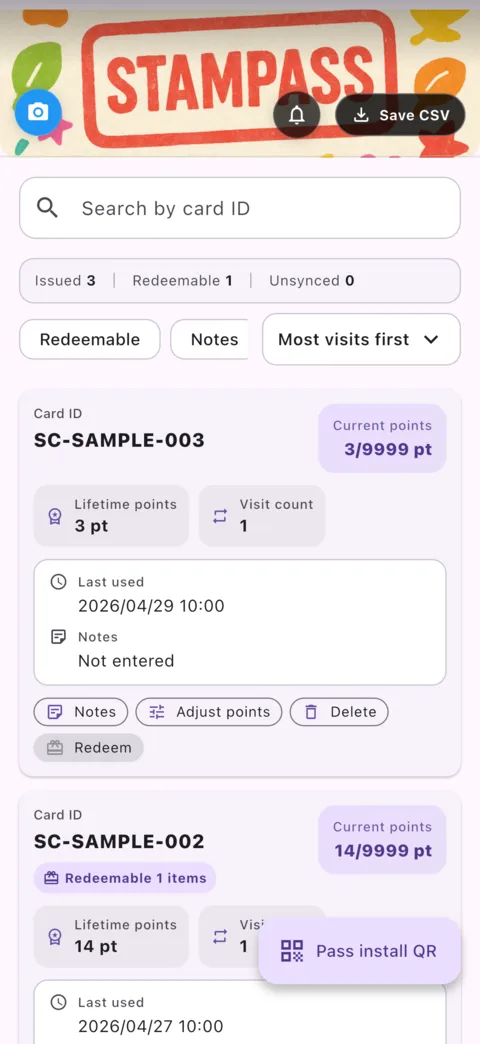
Use the card list only for search, notes, correction, redemption, and deletion.
Final Check Paid
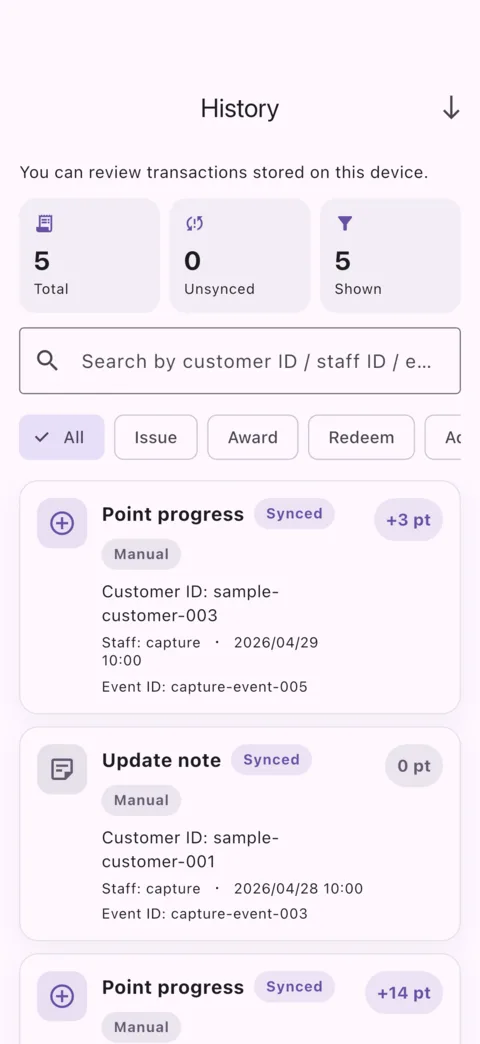
History
History screen
Paid plans can confirm awards and redemptions in history after the operation.

Do This

  1. 1

    Ask the customer to show the barcode on their Wallet pass.

  2. 2

    Open the scan screen and scan the Pass barcode.

  3. 3

    For flexible awards, choose the point amount. For fixed awards, confirm the automatic award.

  4. 4

    When redeeming a reward, confirm the reward and remaining points before redeeming.

  5. 5

    When correcting points, scan the same Pass again before changing the balance.

Steps

4. Use the card list

Use the card list for questions, non-personal notes, point correction, redemption, and deletion.

Steps 1-5 Free
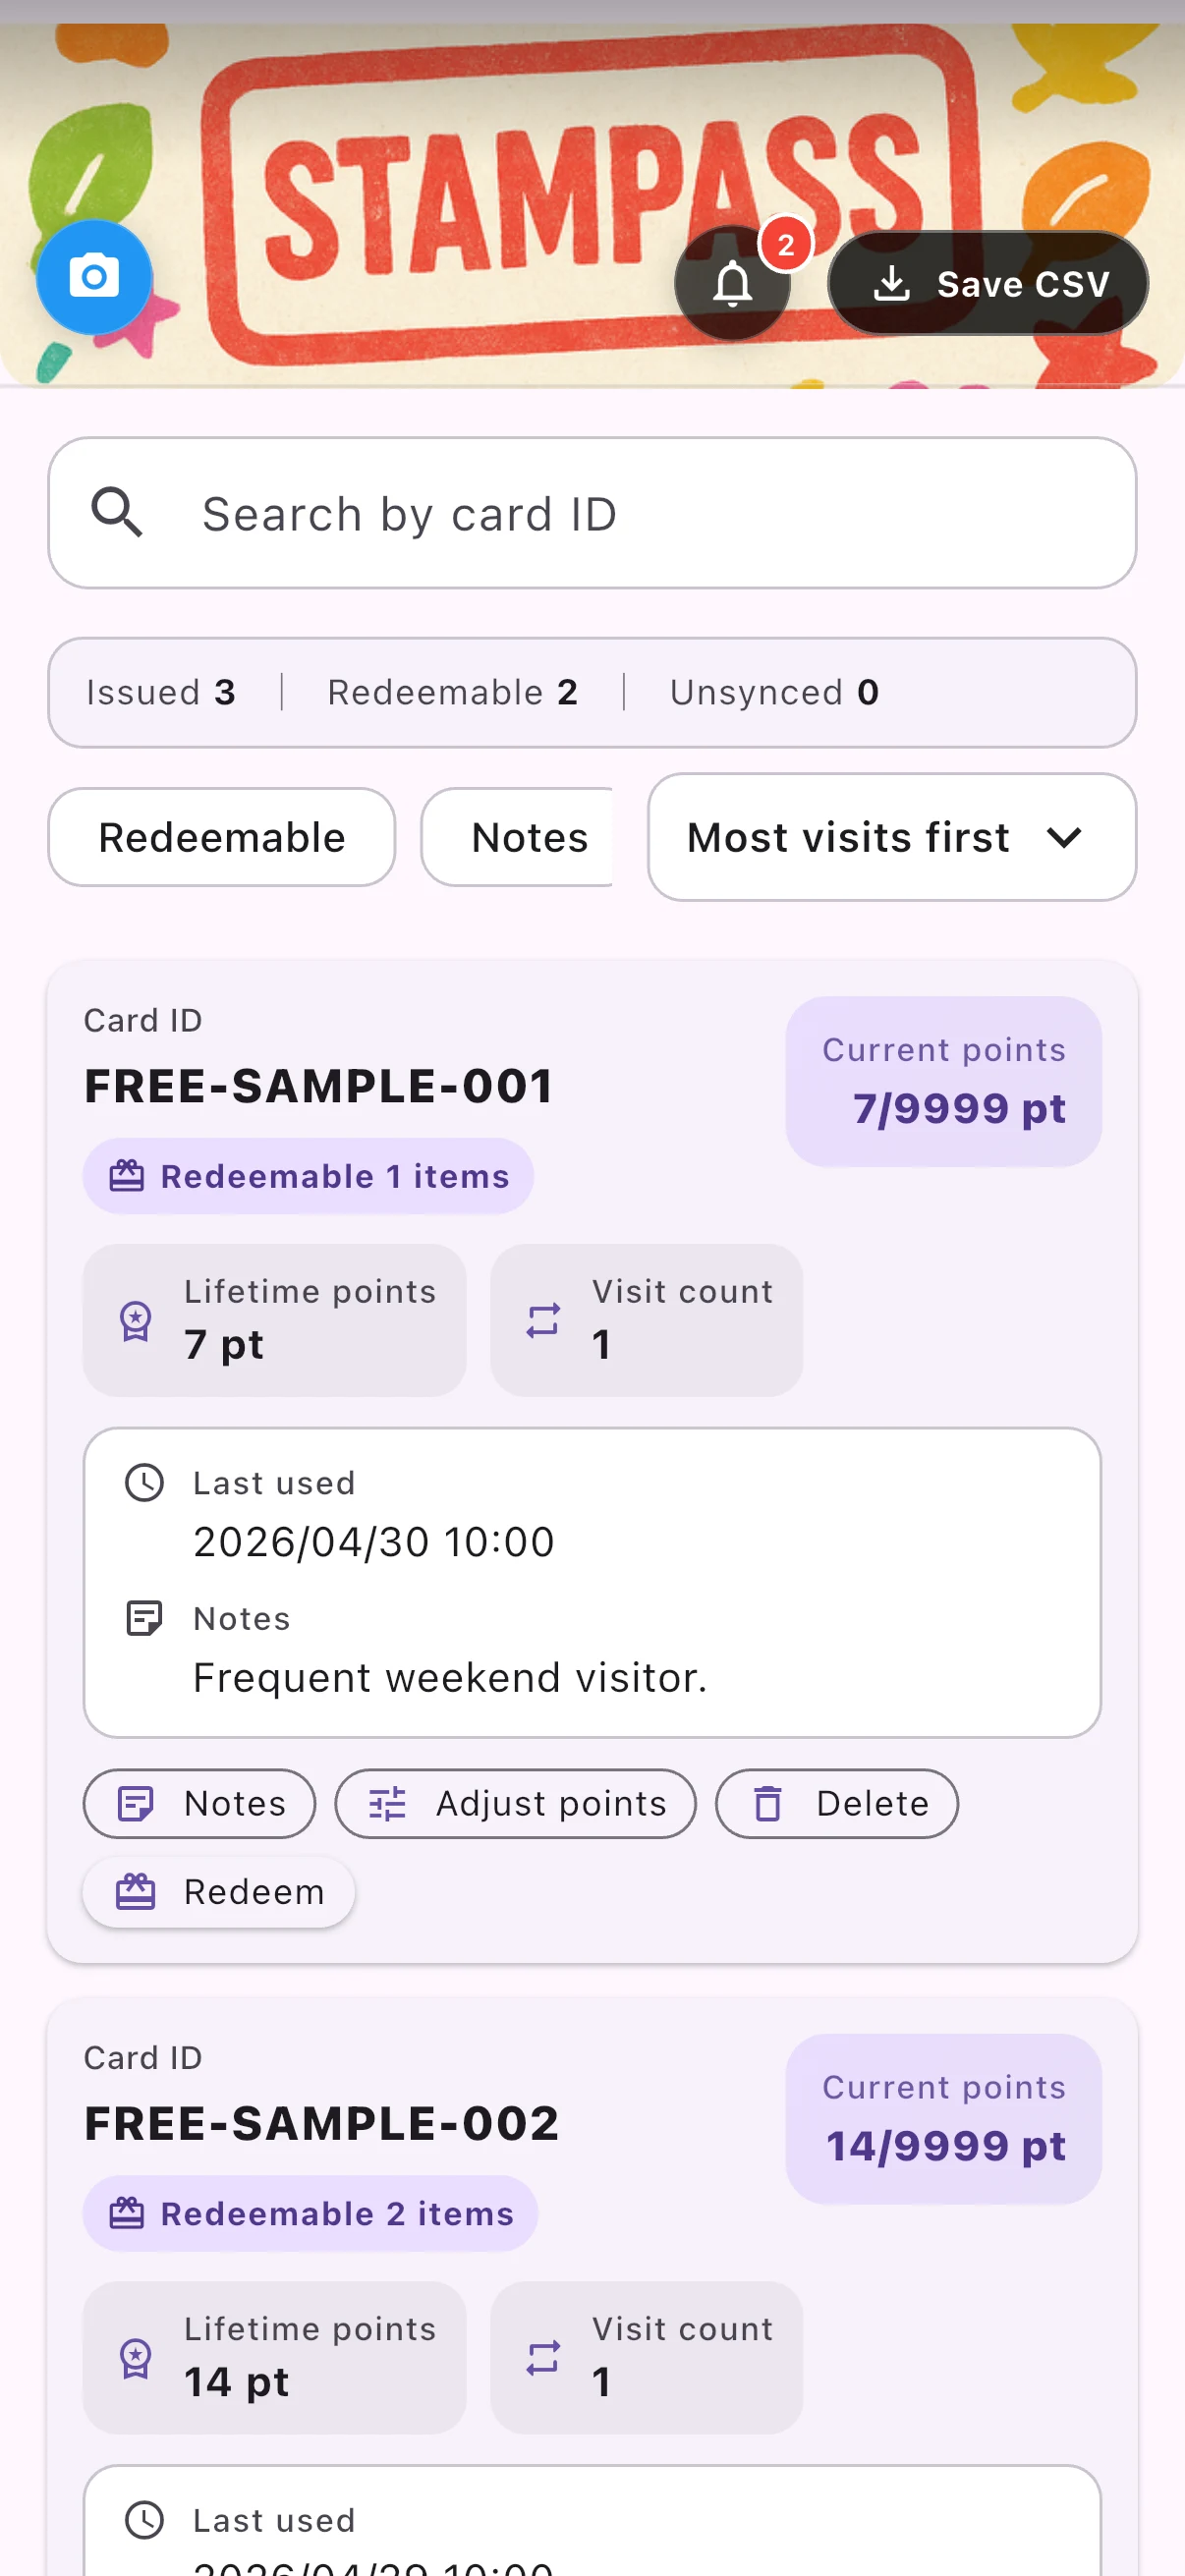
Card list
Free plan card list screen
Basic can manage multiple cards. Use this for checks and support actions, not the normal award entry point.
Final Check Paid
Paid card list
Paid plan card list screen
Paid operation pairs the list with history, export, and recovery workflows.

Do This

  1. 1

    Open the card list and search by card ID.

  2. 2

    Filter by redeemable cards, cards with notes, or revisit order when useful.

  3. 3

    Check current points, lifetime points, visit count, last use, and notes.

  4. 4

    Run note edits, point correction, redemption, or deletion only after confirming the target card.

  5. 5

    Use card-list CSV saving for internal store checks.

Steps

5. Prepare Pass and store info

Prepare the Wallet Pass customers see and the public store profile.

Steps 1-2 Paid
Card settings
Card settings screen
Review Pass appearance, rewards, point-award mode, and the add-pass QR presentation together.
Steps 3-4 Paid
Store profile
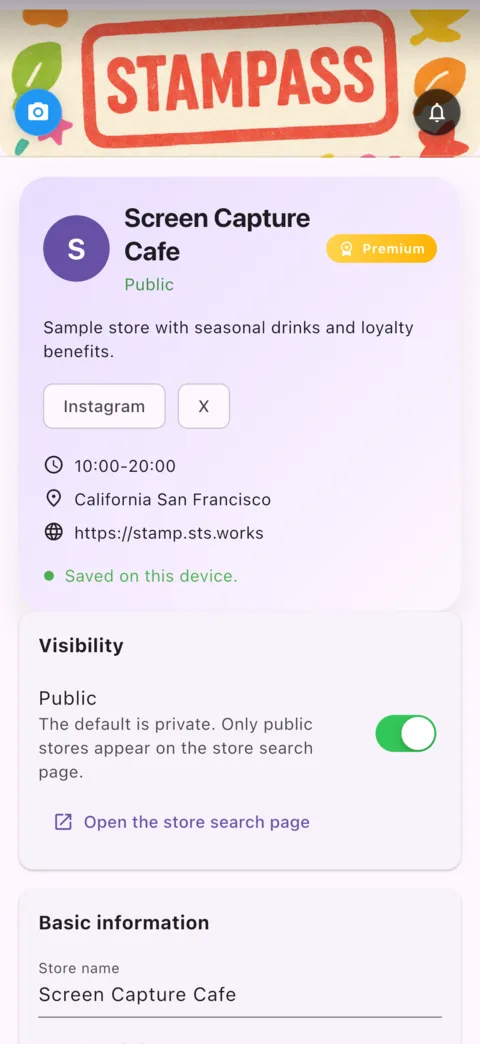
Store profile screen
Save only hours, address, website, and social links that should be visible to customers.
Step 2 Free
Pass add QR
Customer add-pass QR screen
This is also where staff can save a QR-only image or a ready-to-print guide image.

Do This

  1. 1

    In card settings, check the store name, logo, hero image, color, rewards, and point-award mode.

  2. 2

    Check the Pass add QR appearance, then save a QR-only image or ready-to-print poster if needed.

  3. 3

    In the store profile, enter the description, hours, address, website, and social links.

  4. 4

    Before turning on public visibility, confirm that every field is safe to show customers.

  5. 5

    Reinstall the sample Pass and review how it looks.

Steps

6. Prepare for a device change

Save your data on a paid plan before switching devices.

For paid plans.

Prepare Free
Upgrade prompt
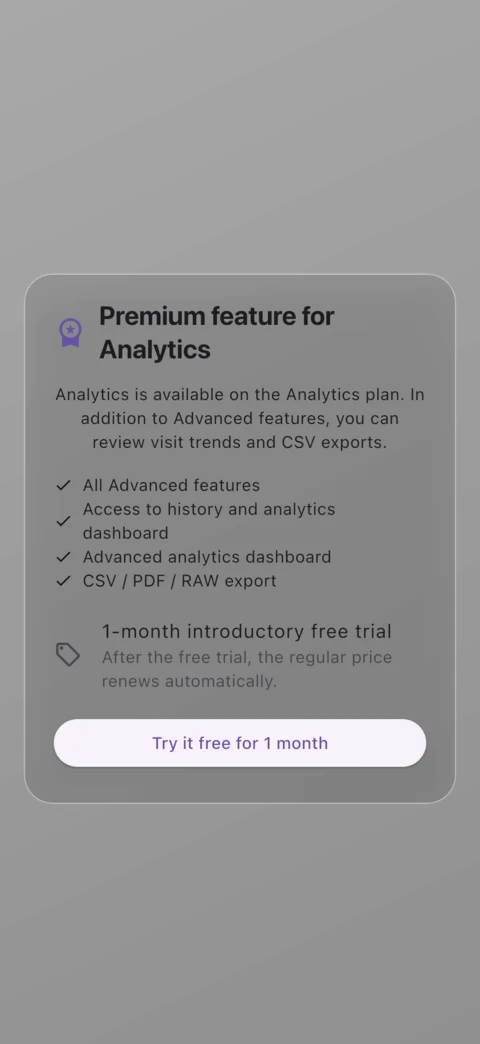
Upgrade prompt screen
Before using backup, confirm which plan is required and what it adds.
Steps 1-2 Paid
Settings
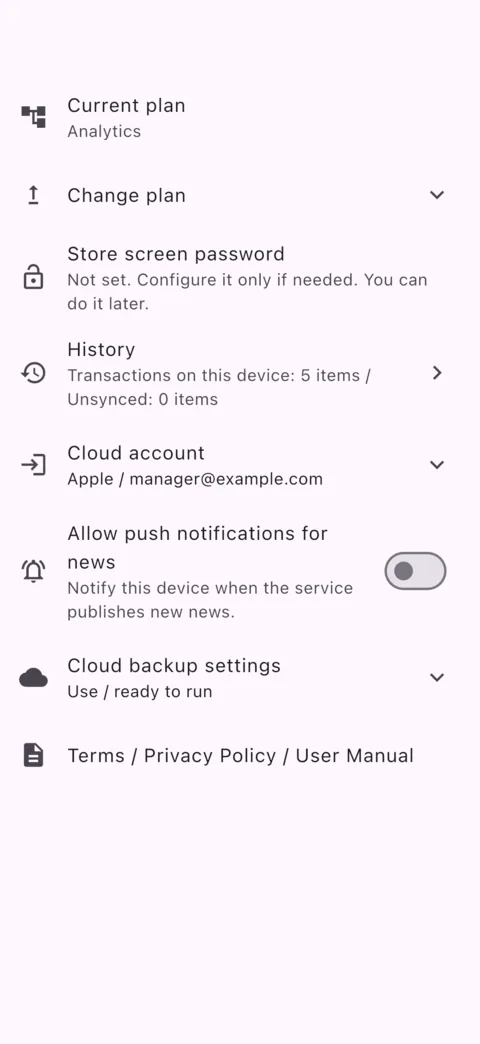
Settings screen
Check sign-in, current plan, and the backup entry point.
Steps 3-5 Paid
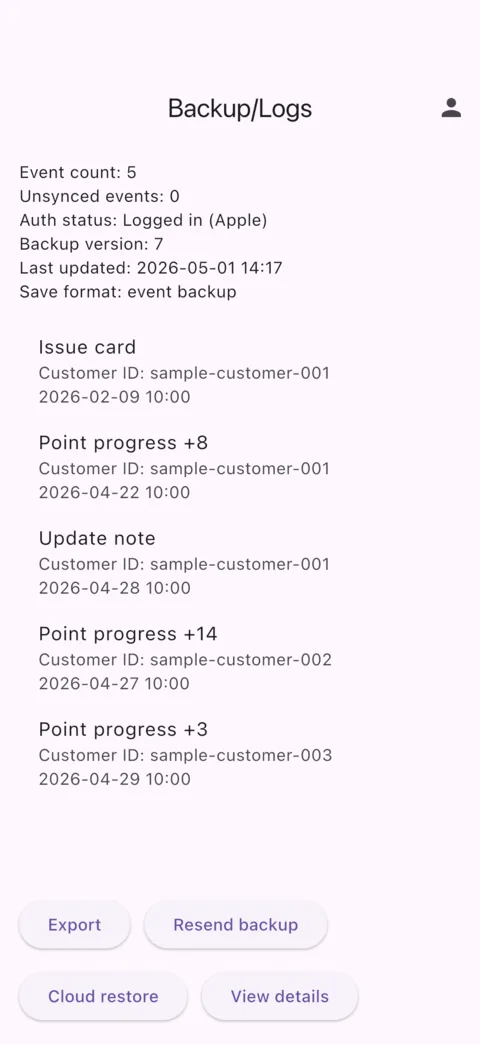
Backup logs
Backup logs screen
Confirm that backup succeeded and there are events available for recovery.

Do This

  1. 1

    In Settings, sign in with Apple or Google.

  2. 2

    Turn on cloud backup.

  3. 3

    Run Backup Now.

  4. 4

    Confirm that the initial-backup-pending state is gone.

  5. 5

    Before switching devices, run another backup with the latest state.

Steps

7. Switch devices

Restore your previous state on a new device.

For paid plans.

Steps 2-3 Paid
Settings
Settings screen
On the new device, sign in with the same account and check purchase and restore paths.
Steps 1,4 Paid
Backup logs
Backup logs screen
Before and after restore, confirm the saved events and the state you want to recover.
Step 5 Paid
Card list
Restored card list screen
After restore, check that card lists, points, and notes have returned.

Do This

  1. 1

    Check on the old device that the latest save is complete.

  2. 2

    Sign in on the new device with the same account.

  3. 3

    Restore the purchased status.

  4. 4

    Load the saved data.

  5. 5

    Check that card lists, points, and notes have returned.

Steps

8. Reissue a Wallet card

Handle lost cards or cards that need to be added again.

For stores using the Wallet card feature.

Steps 2-3 Free
Pass add QR
Customer add-pass QR screen
For reissue, guide the customer to add the Wallet Pass again from the customer add-pass QR.
Steps 1,4-5 Free
Card list
Card list screen
After reissue, use the card list to confirm the target card and balance.

Do This

  1. 1

    Confirm the target card from the card list or recent activity.

  2. 2

    Open the Pass add QR or reinstall path.

  3. 3

    Ask the customer to add the Pass back to Wallet.

  4. 4

    Check that the new Pass can be scanned.

  5. 5

    Share the handling status internally so the old and new cards are not confused.

Troubleshooting

Troubleshooting

Choose the symptom that is closest to what you see, then check from the top.

The Pass barcode will not scan

  1. Ask the customer to brighten their screen
  2. Fit the whole barcode inside the scan frame
  3. Change the angle if glare is strong
  4. Check camera permission on the store device

The customer cannot add the Pass

  1. Show the Pass add QR again from the app
  2. Check the customer's network connection
  3. Guide iPhone users to Apple Wallet and Android users to Google Wallet
  4. Confirm that the store is not using an old printed QR

Backup does not work

  1. Check whether you are on Advanced or Analytics
  2. Confirm that you are signed in with Apple or Google
  3. Confirm that cloud backup is enabled
  4. If the initial backup is pending, run Backup Now

Promotional notices cannot be sent

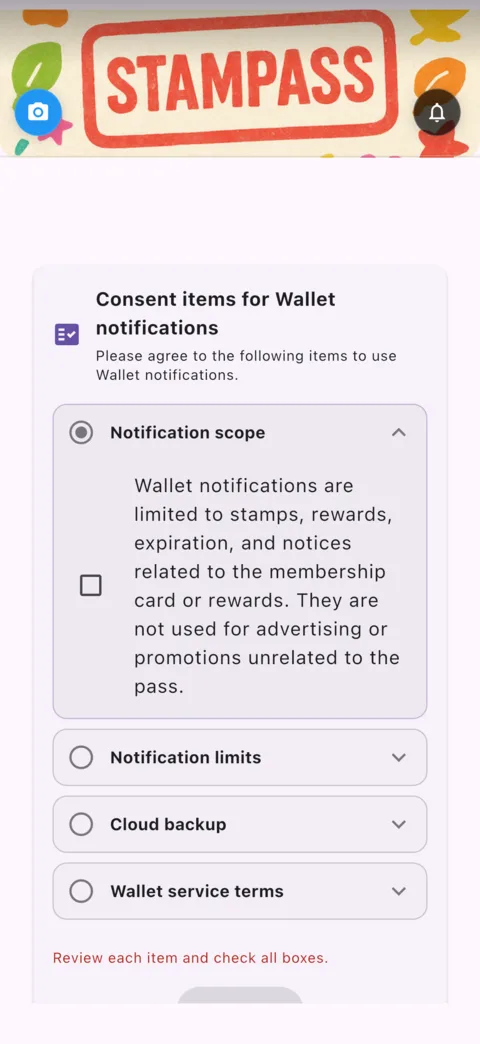
  1. Confirm that notice consent and policy review are complete
  2. Confirm that the initial backup is complete
  3. Check whether target cards are included in the latest backup
  4. Check whether the test-send quota has been reached

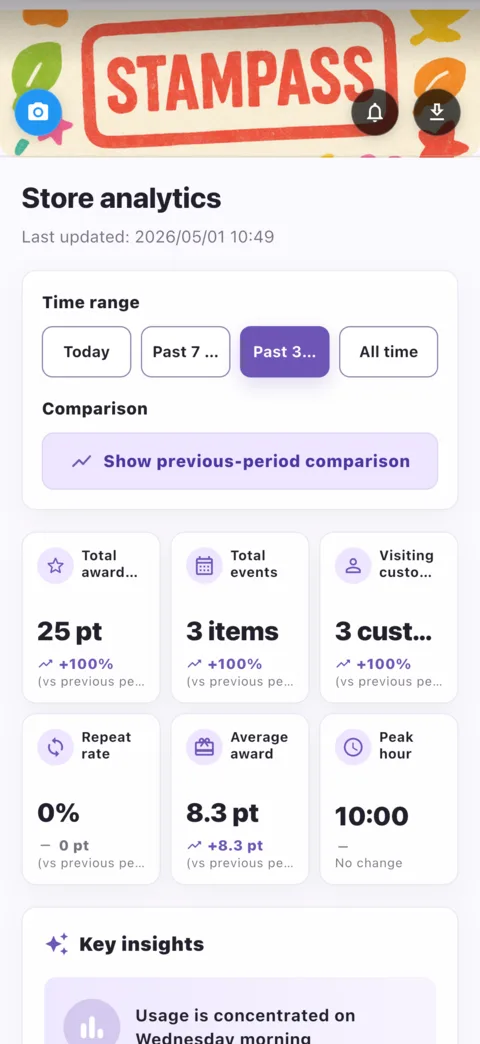
Analytics shows no data

  1. Confirm that the store is on Analytics
  2. Check whether the selected range contains awards or redemptions
  3. Expand the date range
  4. Remember that a new store may not have enough history yet